Crafting a hauberk
Medieval obsession
I've been pretty obsessed with medieval warfare for as long as I can remember. There was something about vikings and knights that was very compelling to a romantic dreamer such as myself. Age of heroism and battle, of loyalty and brotherhood, that I felt was lost in today's world. Of course, those were just fantasies of a young fool, and while I still do appreciate the history, I do not harbour delusions of some lost golden age, where fire and steel would temper fighting men into mythical heroes. The very fact that things like bows, spears and armour were invented, means that fighters in human history did not like getting hit with sharp objects, even if Robert E. Howard or the entire catalogue of Hollywood swashbuckling films tries to convince us otherwise.
During my autumn vacation in 2021, I visited Vapriikki, a local museum, with a few of my friends, to check out an exhibition on medieval knights, and it somehow struck a note with my obsession. I got to try out holding a sword and wearing an actual gambeson and I felt so much joy, that I absolutely needed to take this further. I started immediately planning how I could make a proper hauberk.
The plan
I originally ordered 1.4mm galvanized wire and a brass pipe with a 10mm diameter to wind the wire around, but very early on I noticed that cutting rings by hand results in nasty v-shaped ends. One would need to build a proper jig for creating rings and then using a jeweller's saw or similar to cut the rings for straight ends. Also, the supplier ran out of 1.4mm wire, as that seemed to be a somewhat rare gauge, with 1.2mm, 1.5mm and 1.6mm being more common. I wasn't very impressed with the look of galvanized mail either.
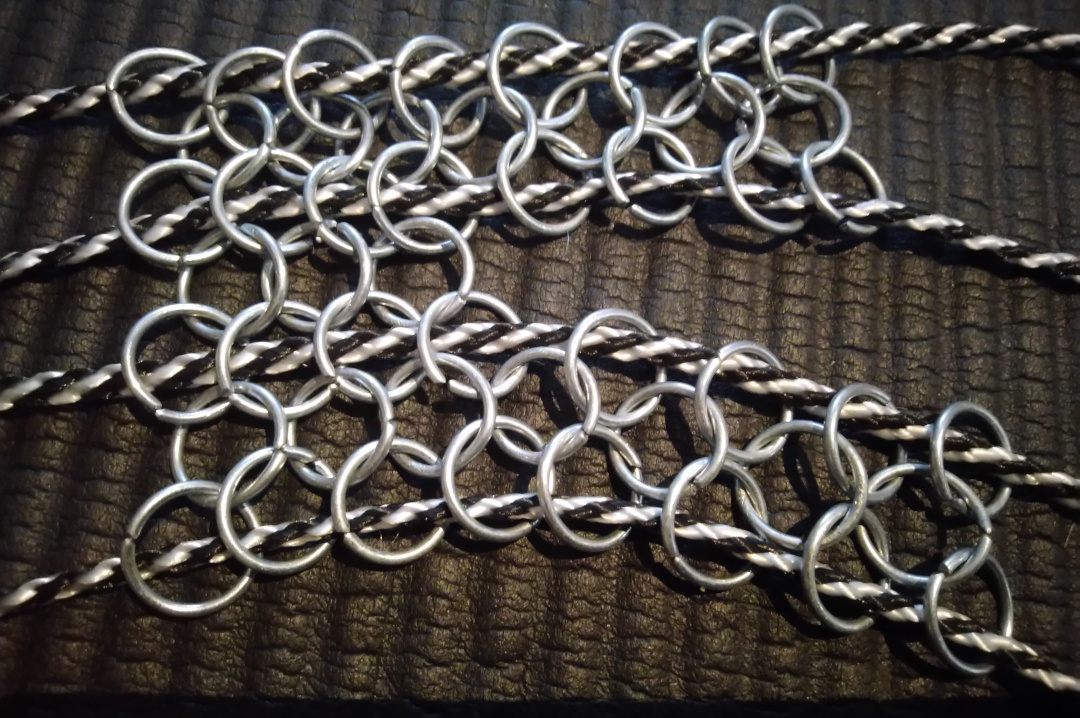
Luckily, I had done only about a weeks worth of work, so starting all over again wasn't such a morale breaker. I ordered 12kg worth of blacked rings (1.6mm, 9mm inner diameter) from Rautaportti (also known as Irongate Armory), whom I wholeheartedly endorse! The rings arrived in just a couple of days. Now with a bunch of ready-made rings, I could just concentrate on sewing (can you call it sewing?) mail and I caught up very quickly - in a single week I was already a lot further than I was with the previous setup.
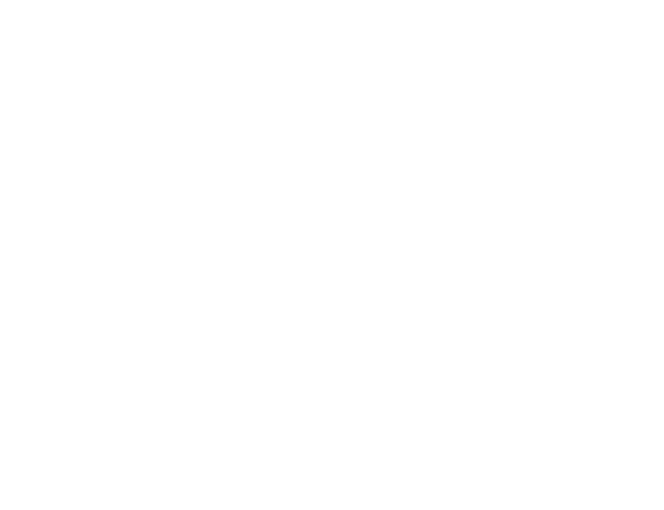
I did quite a bit of research on shirt designs and as the amount of work going to the shirt was going to be huge anyway, I figured I'd go all in with making a properly fitted hauberk. I don't know if this design has an actual name or who came up with it, the idea being that left-right shoulder pieces are connected to the front-back pieces by diagonal seams. This way the armpit requires no special consideration and one can make proper sleeves easily, without leaving the armpit completely unsewn, as seems to be the practice amongst many hobbyists.
I make butted mail vs. riveted, because I do not have a proper workshop nor time to deal with riveting. I do not intend to get hit by weapons, so for me the actual defensive value is a moot point. I'm also not that concerned about absolute historical accuracy, just that it's properly fitted, looks nice and I'd rather use a modern rust-proofing strategy so it doesn't bleed oil everywhere on display.
Phase I
I have now about 22,000 rings to work with, so without further ado, let's begin.
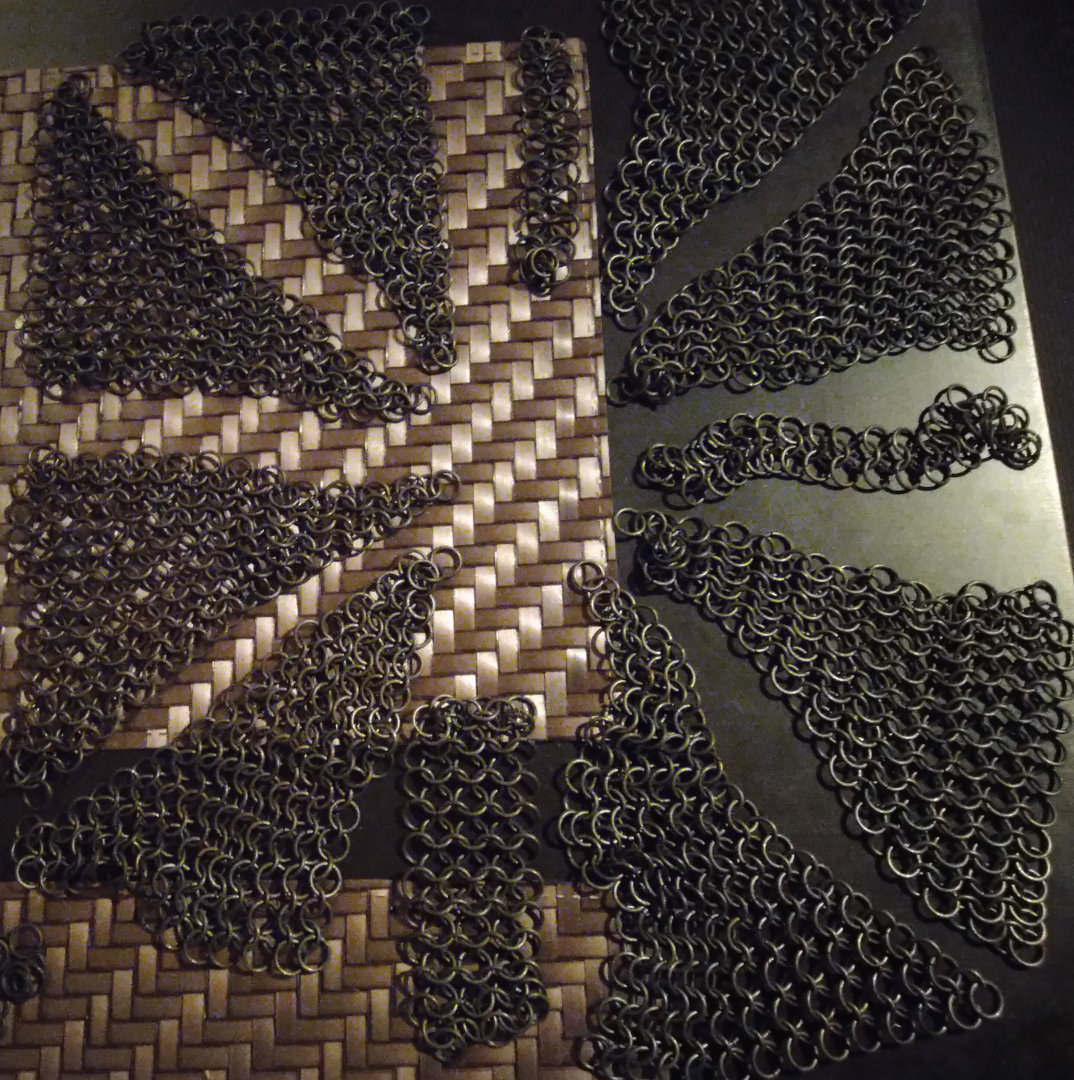
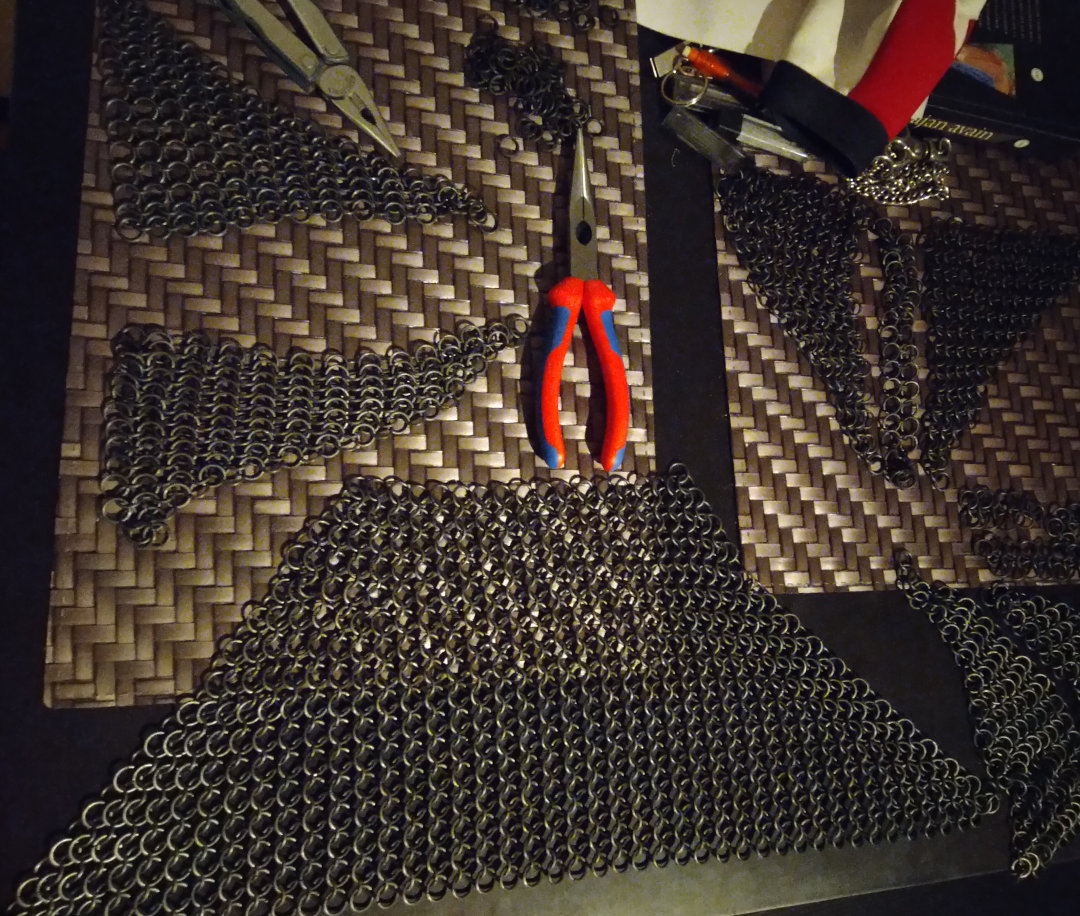
I started with making all the diagonal parts first, as they require a bit of thinking and extra twiddling. You also get a better idea how large the rectangular pieces between diagonals should be.
I feel the most painful thing about early phases is the unknowability of how the shirt will look on you. You need to constantly make estimates and measurements and have a general idea of how much padding will be on any given body part. My original plans changed quite a bit along the lines of how many rows of diagonal space is there going to be and how large should the shoulder pieces be, as it translates directly to whether sleeves are nicely fitted.
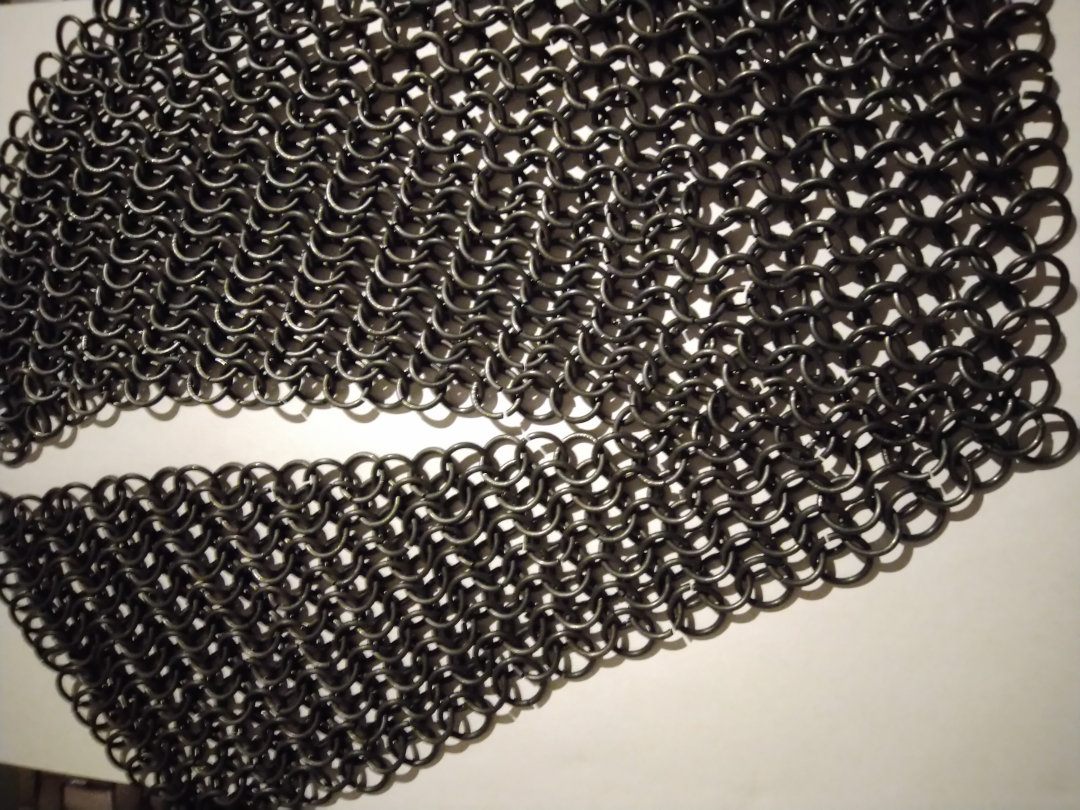
Diagonals were much harder on the wrists, it's very hard to get a proper grip when the pieces meet at an angle. You need to use much more force to get the rings bend. The good thing is that there are no diagonals apart from the shoulder piece connections, so the rest of the hauberk is just simple work, with no more tricky bits.
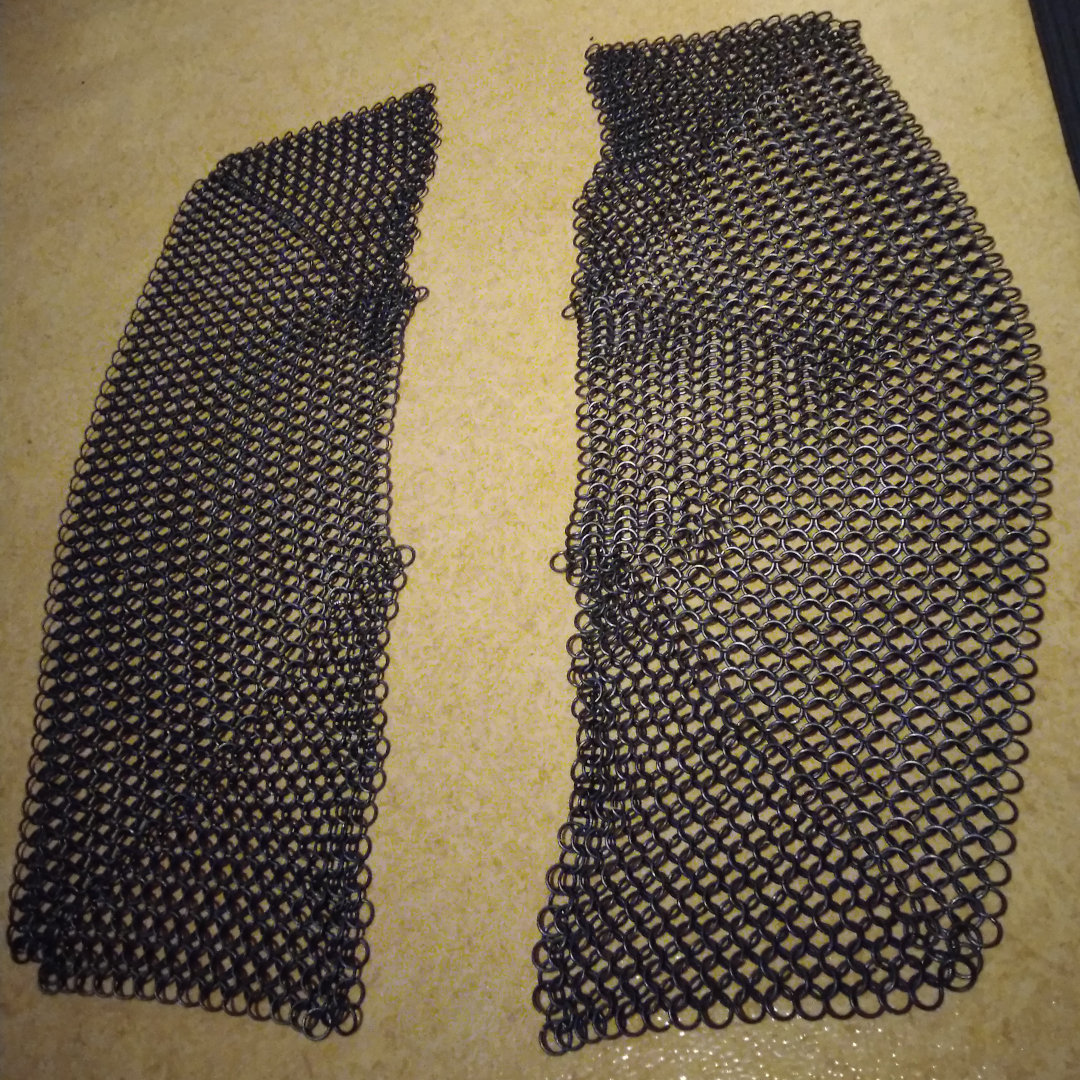
Here I started having some serious concerns about the size of shoulder pieces. At first they were too small, so I think I overestimated and ended up making them a bit too big.
Here you can clearly see how large the shoulders pieces are, both the front and the back hang pretty low and there's quite a bit of leeway in the sleeve hole. I'll wait until my gambeson arrives and try on the armour with some actual padding. If the shoulders indeed prove to be too large, I'll take a few rows off from each side to make it fit a bit better. That's a nice thing about working with mail, it's easy (if a bit labor-intensive) to tweak, just open a seam and add/remove a row.
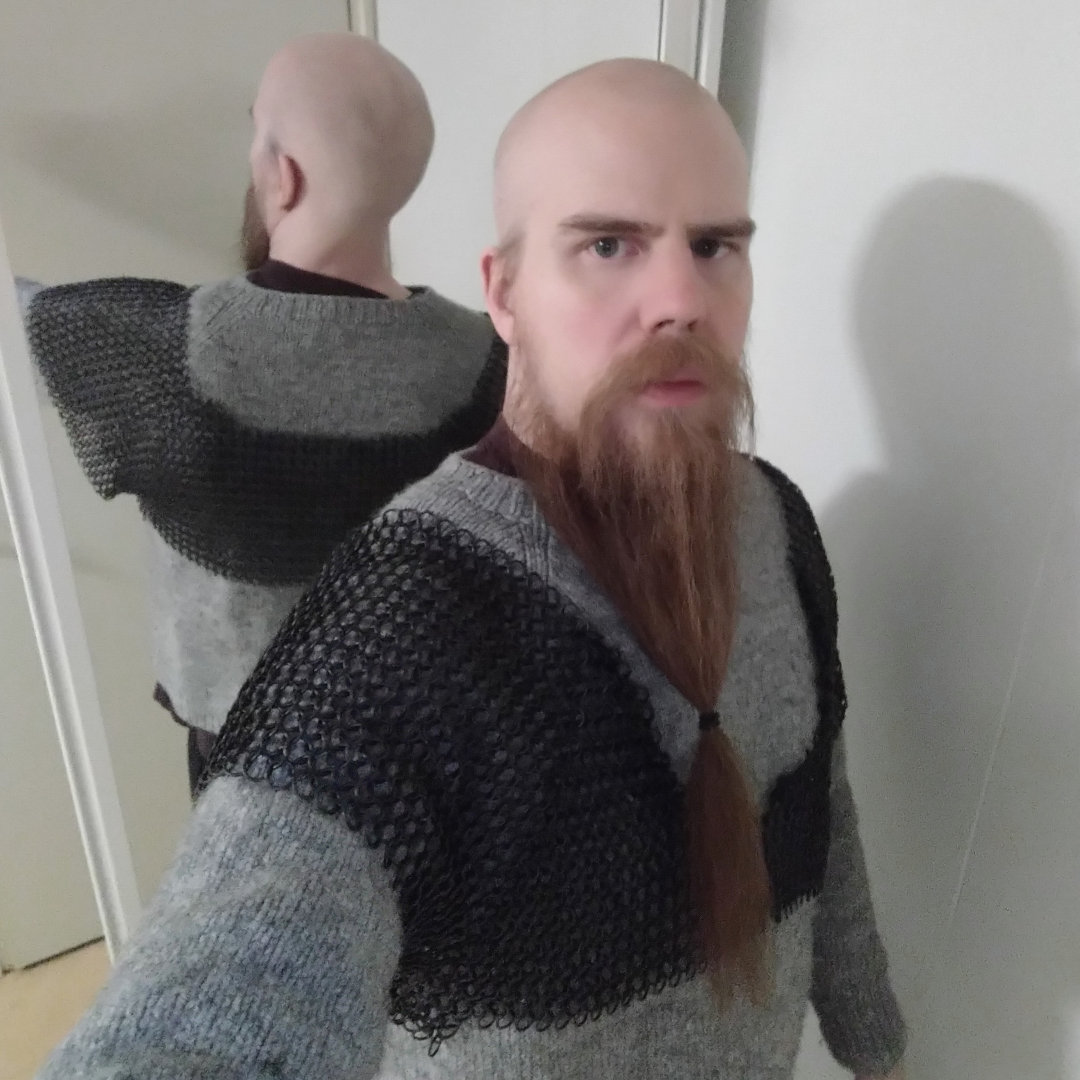
Also, I've taken a habit of tying up my beard while trying this on, as my hirsutism tends to get stuck between the rings.
Phase II
My gambeson from Rautaportti arrived, so I could now start working on fitting the shirt. I made small contractions on the back to tighten up the midriff a bit, so I could use a girdle with the shirt to take off some weight off my shoulders. These contractions are positioned under the shoulder blades, and I will expand these back to their original width, as I start getting closer to the hem of the shirt, so it flows nicely along the gambeson.
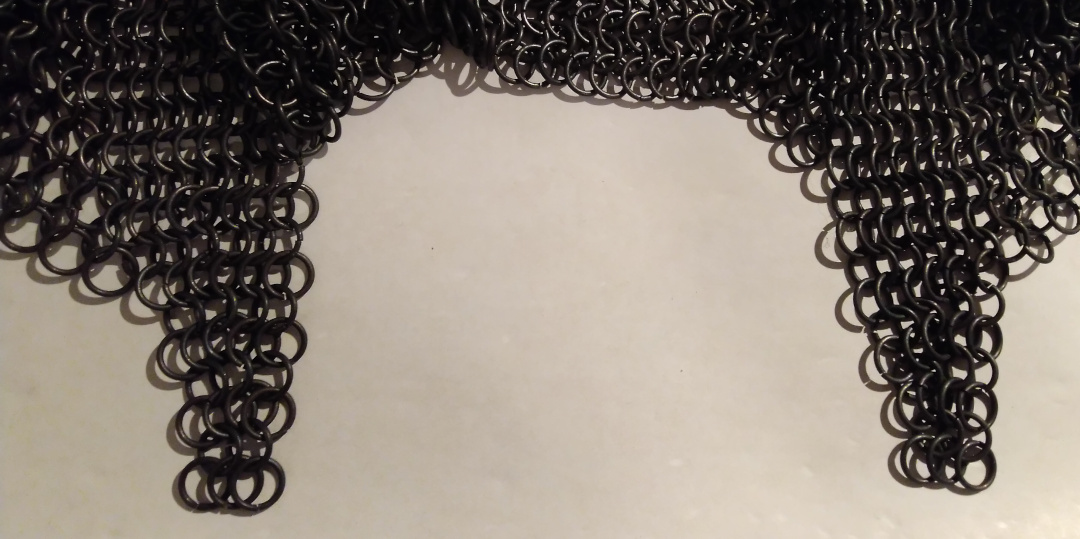
I also started working on sleeves, which had similar contractions in the armpit, to make sleeves sit better and taper towards the elbow. My previous fears about too large shoulder pieces proved to be correct, forcing me to create contractions on shoulders as well. This was somewhat boring work, so I have no photos of making the contractions, as it involved just opening already sewn parts and rearranging the rings to taper a bit.

At this point there's not much of design-work left, mostly just making large rectangles of mail and attaching it to the base of the shirt. This is also probably the most time-consuming part of the project.